22 · Machine
Machine zeroing & double-sided work
Where X0 Y0 is on the board and how both sides stay registered.
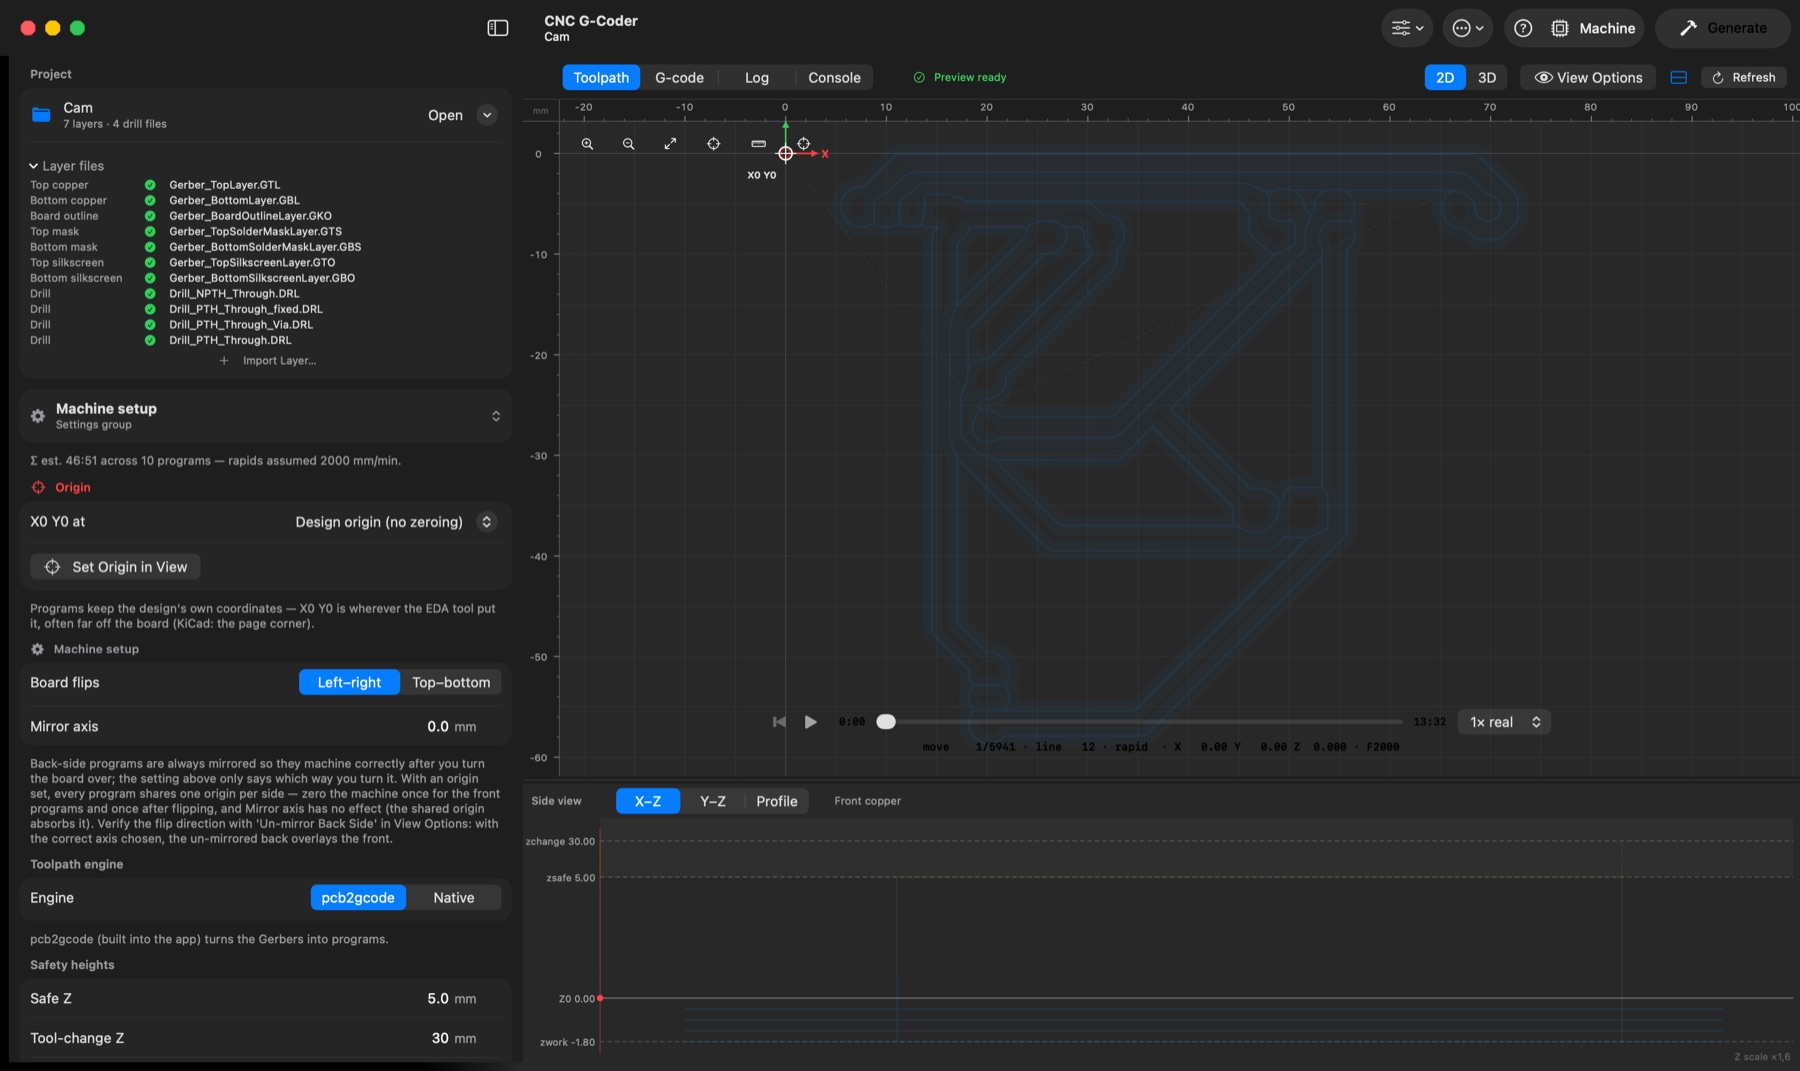
Machine setup → Origin → "X0 Y0 at" decides where the machine origin is on the board; every program shares it, one origin per side. The view marks it with a ringed crosshair and red X / green Y arrows (always framed by Fit).
- Corners / Centre — of the whole project (all programs' extent) as the machine sees each side: after flipping you touch off at the same corner of the fixture.
- Custom point — a point in design (Gerber/EasyEDA) coordinates, so tool sizes never move it. X0 Y0 stays at that same machine point for both sides: flip the board in place and the back programs are mirrored to land on it. Type Origin X / Y, or set it in the view (below).
- Moving it in the view — drag the origin marker to where X0 Y0 should be, or click Set Origin in View (Machine setup) / the scope button and click the spot. Both snap to the project's corners and centre (which set that corner mode) and to drill holes (a custom point). With Snap to Grid on (View Options, or View → Snap to Grid, ⌘'), any other drop lands on the grid shown in the view, so the origin moves in whole grid steps; zoom in for a finer grid.
- Design origin — no zeroing; coordinates exactly as exported. The back-side programs are still mirrored about the board's centre line, so they cover the same X/Y range as the front ones.
Zero X/Y once at the origin and Z on the board surface. The front-side programs (copper, drills, outline, top mask) run from it, and so do the back-side programs after you flip the board in place about its centre line — they are mirrored to land exactly where the front ones were, so nothing is re-zeroed. Choose the flip direction with Mirror around Y axis and verify with Flip Back View. Probing and height maps are done live from the Machine panel (below); the programs themselves stay plain G-code.