24 · Machine
Machine panel
The built-in GRBL / FluidNC sender: connect, jog, probe, send.
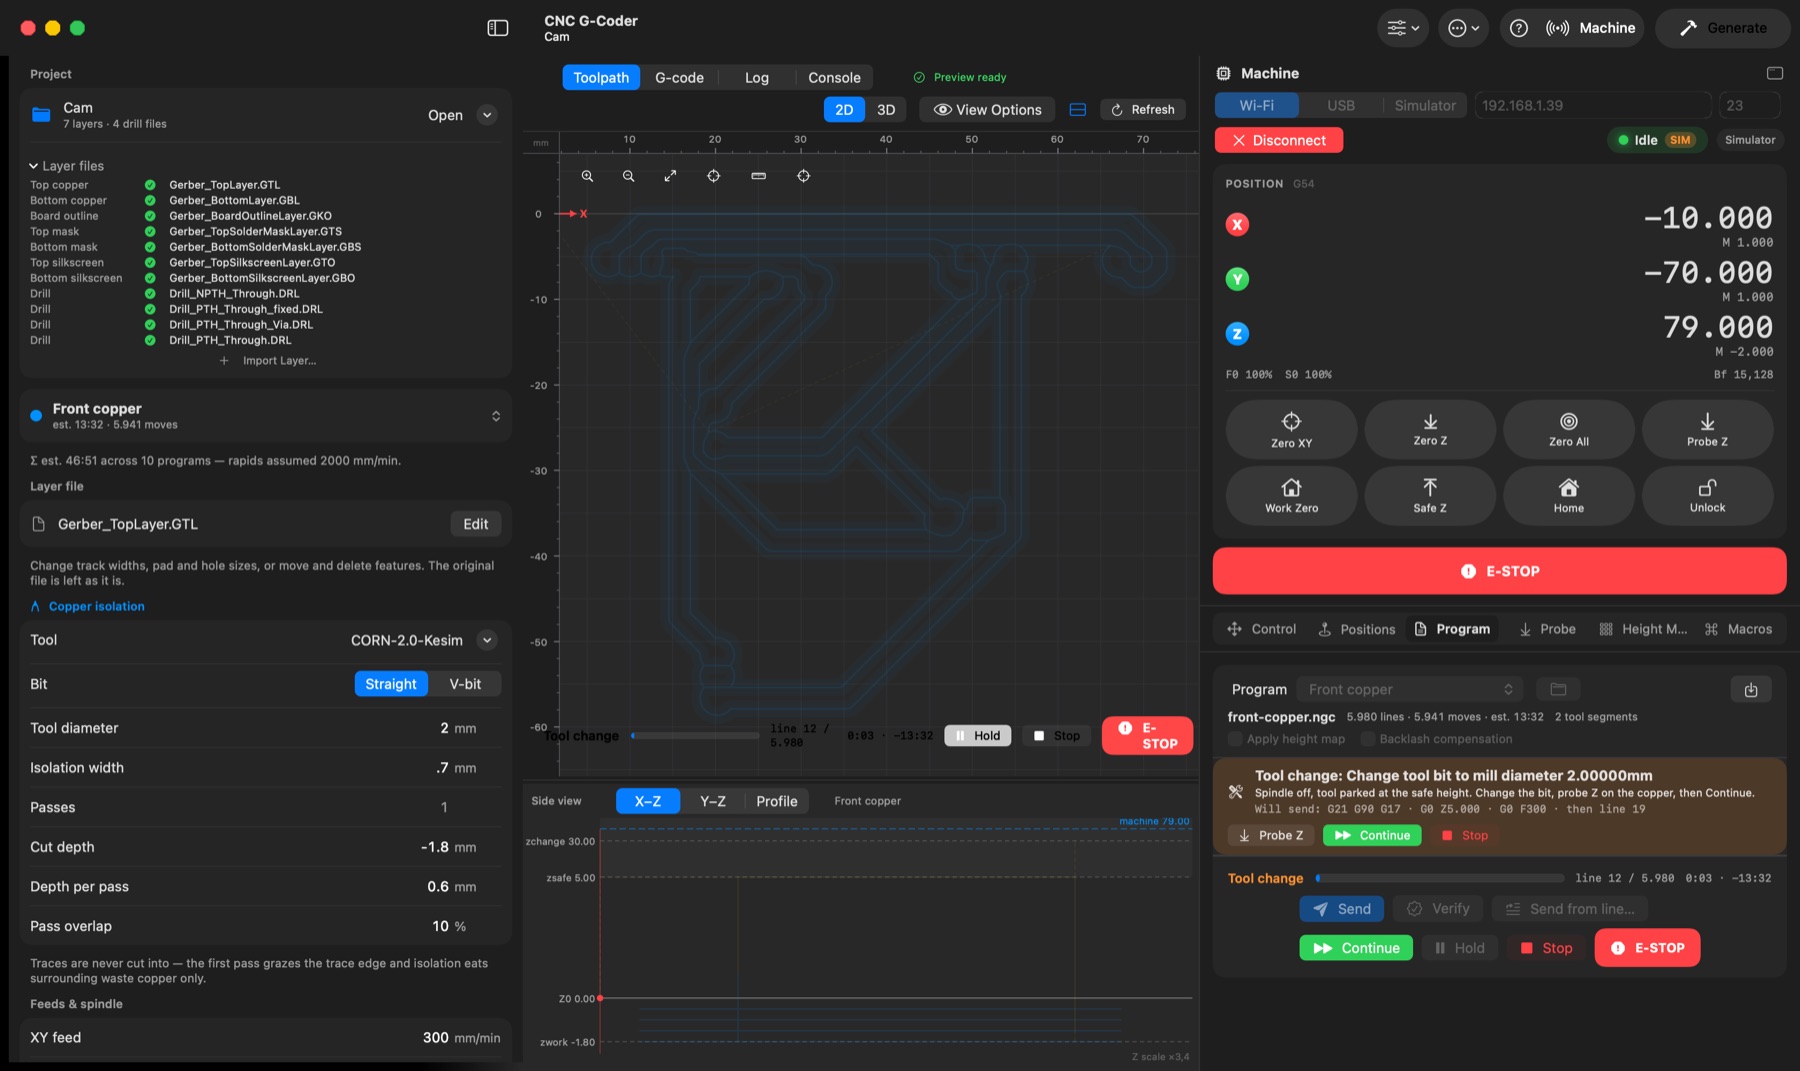
The Machine button in the toolbar (View → Machine Panel, ⇧⌘M) opens a panel on the right of the main window: a native sender for GRBL 1.1, FluidNC and Makera Carvera controllers. The connection strip and the position read-out stay at the top; the tabs below (Control, Positions, Program, Probe, Height Map, Macros) scroll on their own; a red E-STOP under the read-out stays in view on every tab; the console is the main window's Console tab, and "Open in a window" at the top of the panel gives the same controls a window of their own with the program text.
Connecting
The Controller menu at the left of the strip picks the firmware family: GRBL / FluidNC or Makera Carvera. Pick Wi‑Fi (the controller's IP and telnet port, 23 by default) or USB (a /dev/cu.* port at 115200) and press Connect. For a Carvera, Wi‑Fi means the machine's own TCP port (2222; the magnifier beside the port listens for Carveras announcing themselves on the LAN and fills in the address) or USB; the Carvera accepts one client at a time, so quit or disconnect the Makera controller first. The app finds out which protocol the firmware speaks (plain text or Makera's framed protocol), reads version and model, and takes the travel from the profile — the firmware does not report it. The Carvera's states are Idle / Run / Hold / Home / Alarm / Tool (the changer at work) / Wait (a manual tool change or a pause) / Sleep; its alarms come as text, and Unlock ($X) only answers when the machine is halted. The state pill shows Idle / Run / Jog / Hold / Alarm…, the badge the firmware the app identified ($I), and alarms appear decoded with Unlock / Home / Reset. Alarms that lose position (limits, a reset while moving) mark the position untrusted: Home, or press Unlock to keep the position as it is. The connection runs alongside other clients (a pendant on the same controller keeps working).
DRO, zeroing, positions
Work and machine coordinates, live feed and spindle, the planner buffer and triggered pins (P = probe input closed). Click an axis value to set or zero that axis; the button grid under it has Zero XY / Zero Z / Zero All (G10 L20 P0, persistent) and Probe Z (the two-pass touch-off of the Probe tab) on the first row, Work Zero (retracts to the safe work Z first), Safe Z (just below the top of Z travel), Home and Unlock on the second. The slider icon at the top right of the panel opens Customize Buttons…, like a toolbar customization sheet: drag to reorder, remove, and add other built-in actions (Spindle, Coolant, Hold, Resume, Reset, Sleep) or any macro — New Macro… there creates one on the spot. The Positions tab keeps named machine positions; Go to coordinates… moves to a typed machine target (Z first when rising, last when descending). Save work zero stores where work X0 Y0 Z0 is in machine coordinates, and Use as zero on any entry re-establishes the work origin at that point (G10 L2 P0, no motion) — restore a zero after a reset or re-homing. User buttons on the Control tab run the macros of the Macros tab (one button per macro, optional SF Symbol icon; "allow while running" keeps a button enabled during a job, for short commands such as coolant). E-STOP (also at the end of the job bar, and ⇧⌘.) sends jog cancel, feed hold and soft reset at once without waiting for anything; the position is marked untrusted if the machine was moving. ⌘. stays the controlled stop.
Jogging and overrides
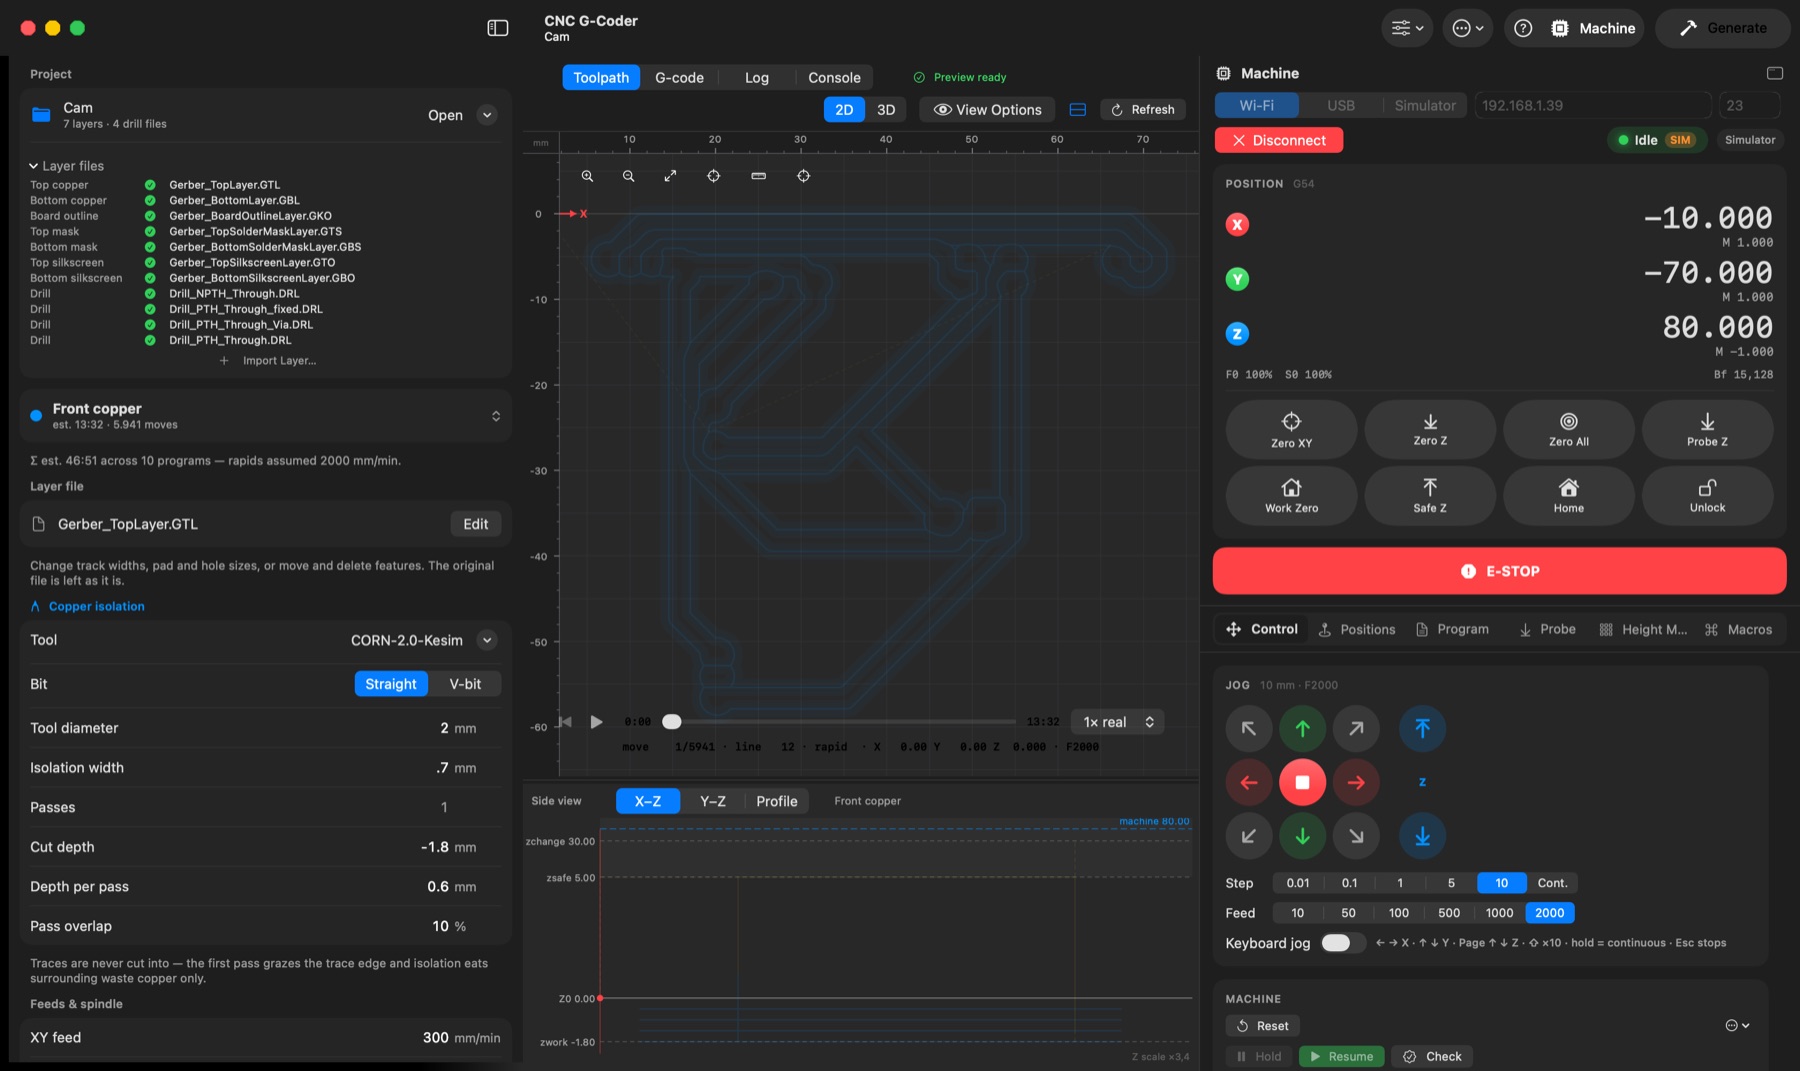
Tap a jog button for one step; press and hold for continuous motion that stops on release (on a homed FluidNC with soft limits the jog runs to the limit and is cancelled on release; otherwise short segments are streamed). Diagonal buttons move two axes. Keyboard jog: arrows = X/Y, Page Up/Down = Z, Shift = step ×10, Esc or ⌘. = stop. Overrides adjust feed (10–200 %, in steps of 1 and 10), rapid (25/50/100 %) and spindle speed in real time; the controller reports the value it is using. On a Carvera the firmware jogs itself: a step is $J X-0.1 F600, press-and-hold is $J -c, kept alive by the status polls and stopped with Ctrl‑Y on release; feed and spindle overrides go through M220 / M223 (no rapid override; the machine echoes the value it uses in its status).
Machine controls (Control tab): Reset (Ctrl‑X soft reset — stops everything; the position is lost if the machine was moving), Hold / Resume (feed hold, cycle start), Check ($C — G-code is parsed but nothing moves), Spindle on/off at the rpm beside it (clamped to the minimum and maximum in Settings → Machine), Coolant (M8/M9), and under More: Sleep, Safety Door, and the queries $G (parser state), $# (offsets) and $I (build info), whose answers appear in the Console. On a Carvera a Tool menu follows: the bit in the spindle as the machine reports it, named from the tool changer; any slot (or T0, the probe, or nothing) to run a T<n> M6 by hand; Calibrate Tool Length (M491 — the tool setter measures the bit or the wireless probe and the firmware stores its length, the step Makera's app calls Calibrate, and what clears "Probe not calibrated"); Check Tool for Breakage (M491.1); Set Tool Number Without Changing (M493.2) for a bit you put in by hand, to be calibrated next; Unclamp / Clamp Collet (M490); and for the wireless probe, Pair (M471 puts the receiver in pairing mode, then hold the probe's button until its light confirms) and Probe Laser On (M472). The probe's battery voltage (the status W:) shows under the menu, orange when it needs charging.
Positions tab
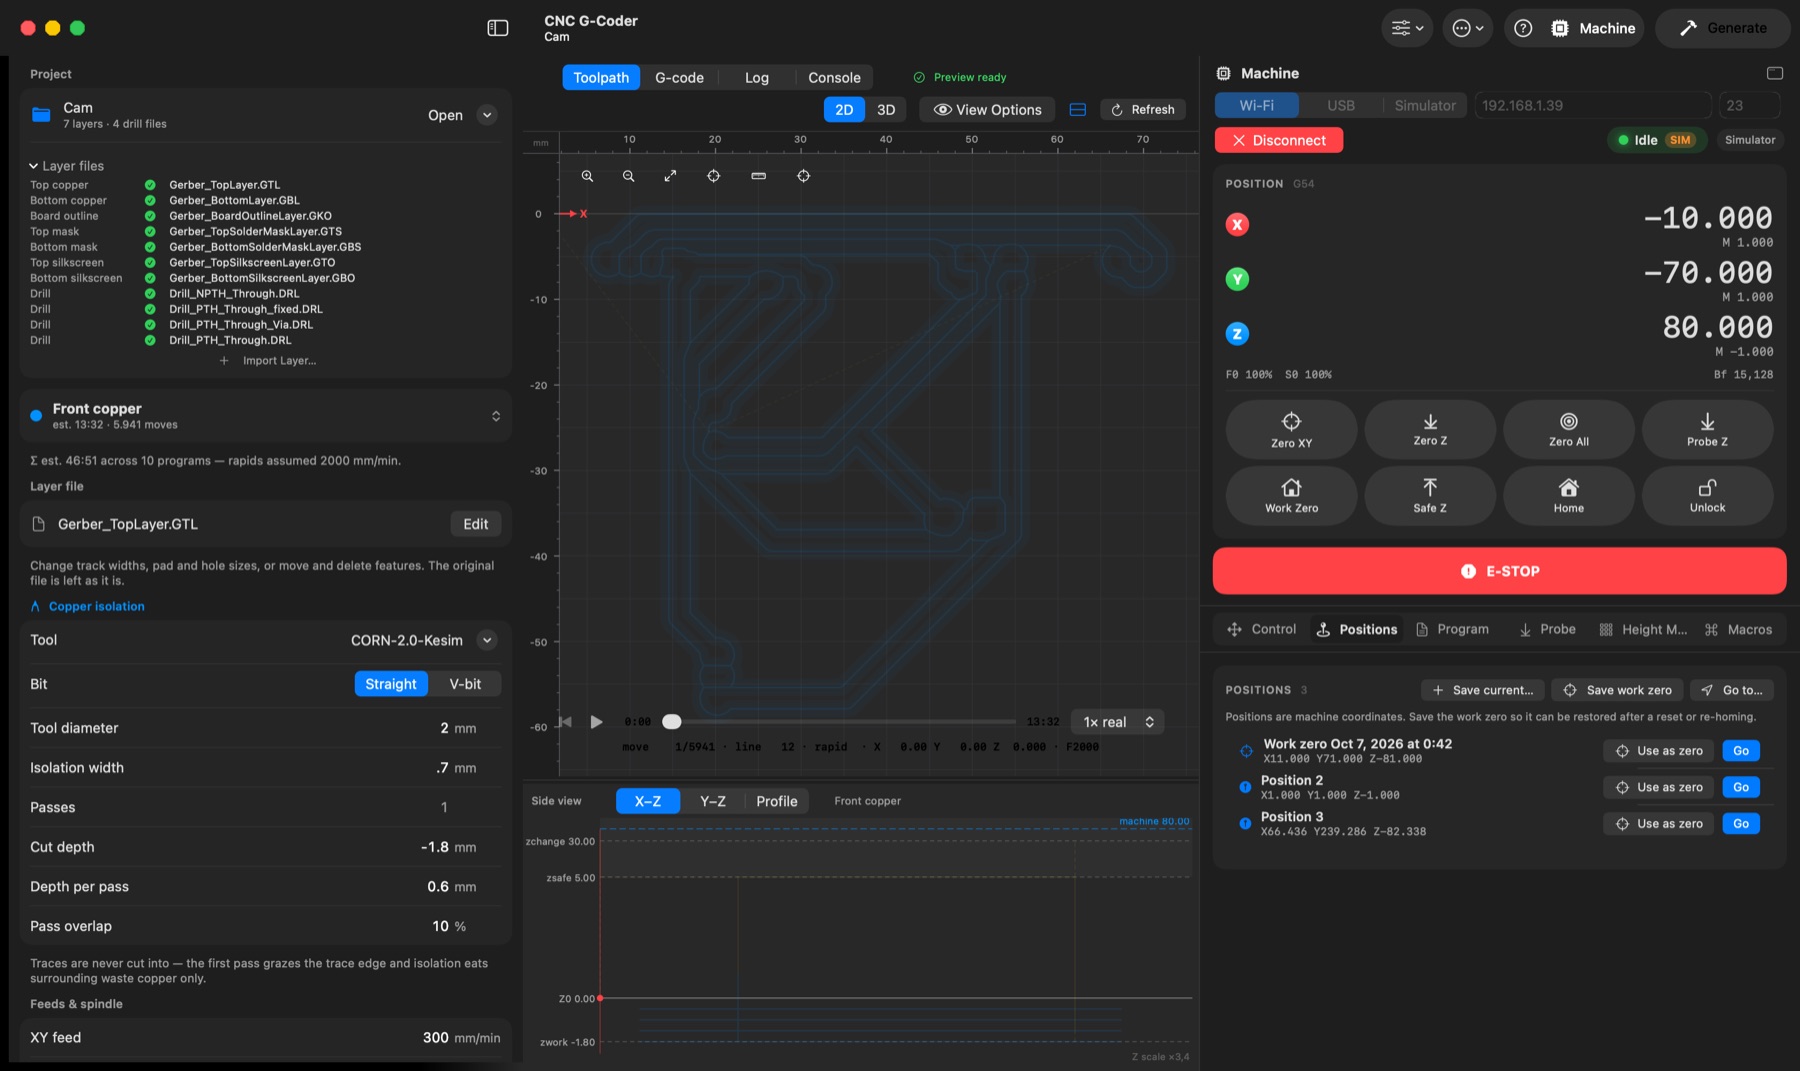
Named machine positions in two lists, chosen with the Machine / Work switch. Machine holds spots the spindle goes back to: Save current… stores the machine coordinates the spindle is at now, Go to… moves to a typed machine coordinate, and each entry has Go (Z moves first when rising, last when descending, at the jog feed). Work holds work zeros — where work X0 Y0 Z0 was, in machine coordinates: Save work zero stores the current one by hand, and with Save the work zero when a program is sent (Settings → Machine, on by default) every Send records one automatically, named after the program and the time ("Front copper – 8 Oct 14:07", clock icon). Use as zero on a Work entry makes that point the work origin again with G10 L2 — the machine does not move — so after a crash, a reset or re-homing the same zero is back without touching off again. Right-click an entry for Rename…, Overwrite with Current Position / Current Work Zero, Go There… / Use as Work Zero… of the other kind, and Delete. Macros can move to a saved position with @goto <name>.
Program tab — sending
Pick a generated layer (or use CNC export → Send … to Machine… in the sidebar), or Open .ngc file… for an external program (a test board, for example). Backlash and Apply height map transform the copy that is sent, never the files on disk; Save sent program… keeps that copy. Verify streams the program in check mode without motion. If the machine's travel cannot hold the program the job bar says so in full — for example that line 12 rises to a Z above the top of travel because work Z0 is near the top; when that is the only problem, Clamp Z to top re-prepares the program with those retract heights lowered to just below the top (cutting depths are untouched; an orange "Z clamped" badge shows while it is on) so an air test can run. Send first shows which layer is about to be milled — name, side (back-side programs get a flip reminder), tool, cutting depth, estimated time and what the streamed copy carries — and streams on Start (Settings → Machine → Confirm the layer before sending a program turns the sheet off); the sheet's "cuts to Z" line is read from the exact text about to stream, so it is the ground truth for the depth. The loaded program always follows your edits: changing a parameter regenerates the preview and the program re-prepares itself from it, and if you press Send while that is still happening the app warns — The preview has newer edits — and asks whether to wait or deliberately send the previous version. It streams with character counting; the main window's canvases, side view, 3D view and G-code tab follow the job, a blue crosshair marks the machine's real position, and the job bar shows the line, elapsed and remaining time — the remaining time is the program's feed-rate estimate scaled by the pace measured so far (real machines run segment-dense paths below the programmed feed), so it converges on the truth as the job runs; time spent in feed hold or waiting for a tool change is left out. The Mac is kept from idle-sleeping while a job streams, and the display sleeping does not stall the job or freeze the progress. Hold/Resume and the overrides stay live. Stop holds, resets once the machine is at a standstill, and turns the spindle off.
Tool changes (extra drill sizes) suspend the job before the change: spindle off, Z parked at the top, and a banner names the bit. Jog, Zero and Probe Z are enabled while suspended so you can touch off the new bit, then Continue, which resumes at once — the banner lists the preamble lines it will send (Settings → Machine → Confirm before continuing after a tool change brings back the confirmation sheet). Send from line… resumes mid-program with a safe preamble (retract, spindle, rapid over the point, plunge), always shown for confirmation. The app asks before switching projects, disconnecting or quitting while a job runs.
On a Carvera there is no suspension: the program goes out in the Carvera flavour (the stage files' rules — rack slot numbers, no M0), each T<n> M6 is sent on its own and the app waits while the machine shows Tool, then Idle again with the new bit in the spindle, and carries on. A Carvera Air or Z1 prompts on the machine instead: change the bit when it asks and confirm there; the app continues as soon as the firmware is idle again. Air (M7) is the Coolant button. Probing, leveling and margin use the Carvera's own routines, the ones Makera's controller wraps, so its app is not needed: Probe with the Carvera (Probe tab) makes the machine fetch its wireless probe, touch the surface under the spindle and set work Z0 there; Level with the Machine (Height Map tab) probes the grid border with that probe and keeps the grid in the firmware, which then corrects every move it runs, streamed from here included — the app's own map stays off for sending, and Clear forgets the grid; Margin (Program tab and Height Map tab) walks the program's or the grid's border with the probe laser so you see where the job lands before anything cuts. The changer measures every bit on the tool setter, so a Z0 set with the probe holds for the bits that follow — the Tool reference of the Probe tab is not needed. The plain Probe Z and the app's own height map still work for a bit wired to the probe input. Untested on the machine itself so far. Send Layers… (also the sidebar's Send Stage to Machine…) is where the changer earns its keep: tick a whole stage — mask etch, drills, milled holes, cutout — or any set of layers, and they go out as one program in machining order, a T<n> M6 between them, with the slots of the job's rack; the chooser shows the slots, the estimated time and warns when the ticked layers span two sessions (nothing would stop for painting the mask or flipping the board). The picker names the loaded program after its stage ("2F · Front: mask etch, drilling, cutout"); the canvases follow it like any job, and a regeneration re-prepares it from the new files. The height map of the layers' side applies to the whole program.
Probe tab
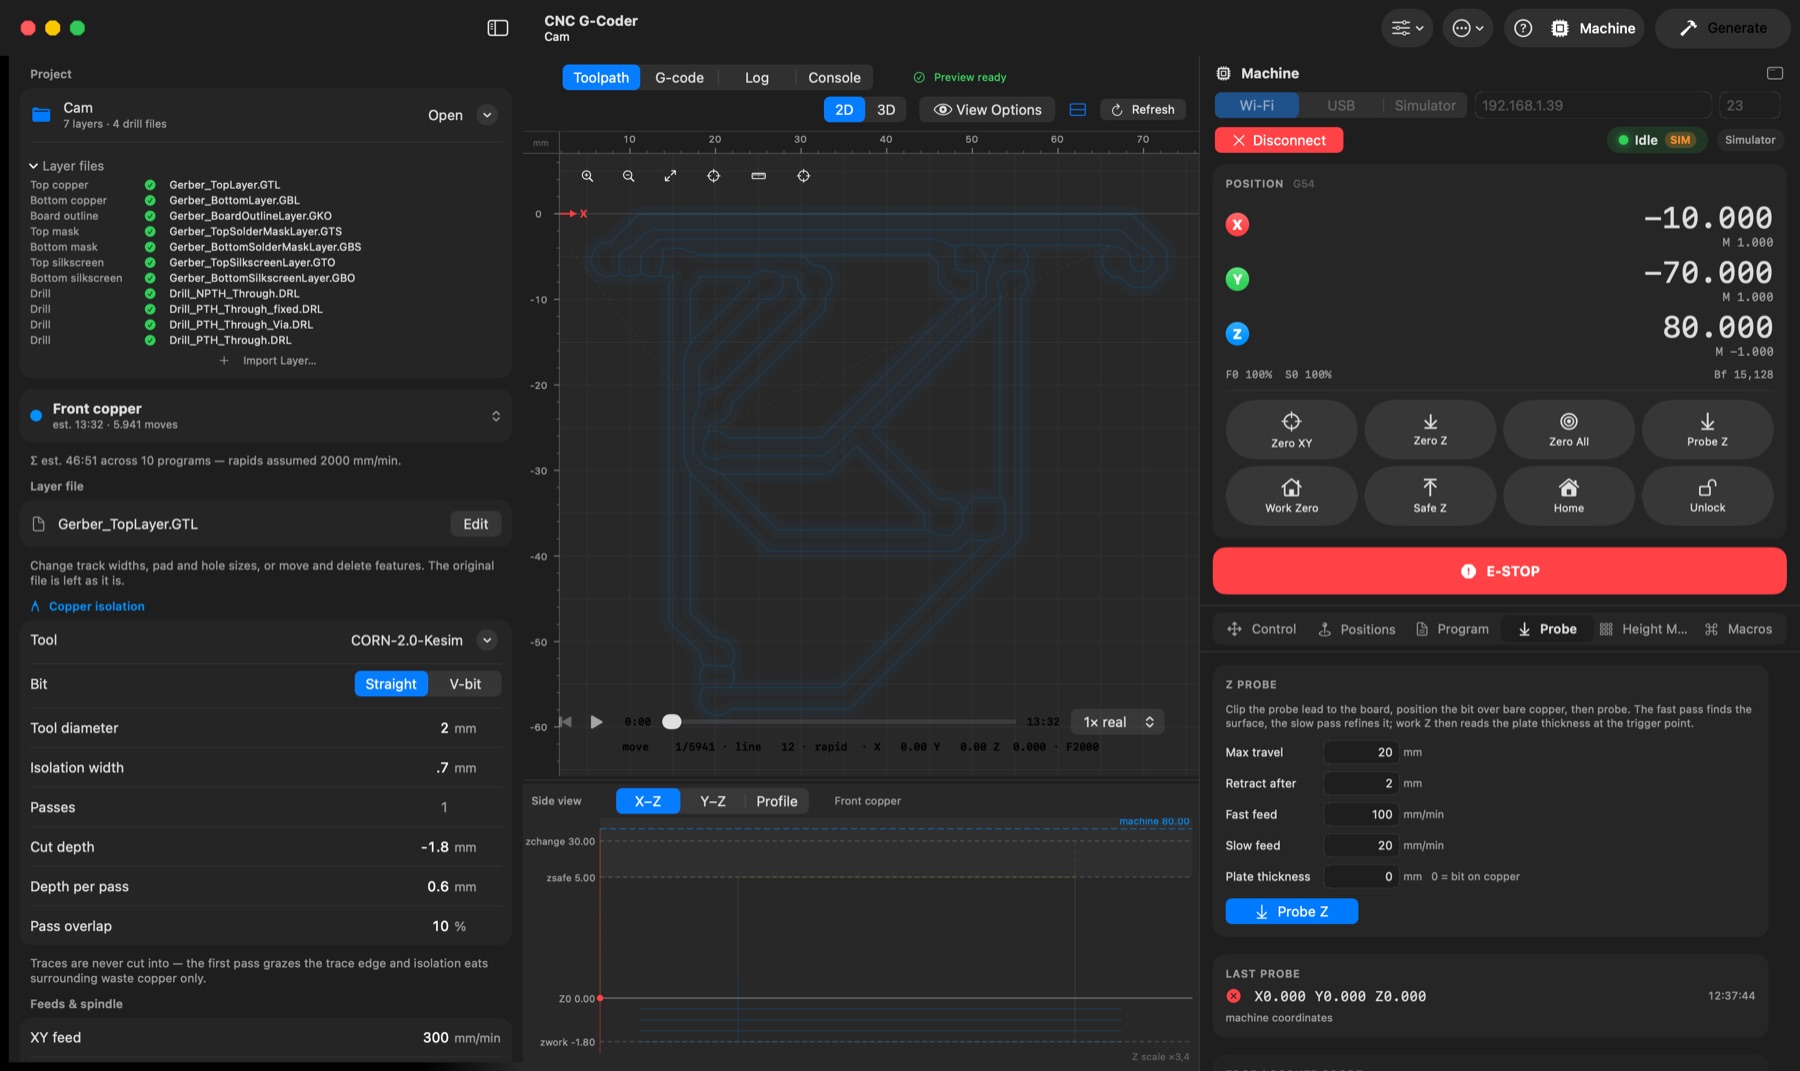
A two-pass Z touch-off: fast down to find contact, back off 1 mm, slow down for the exact point; the active work origin is then set on the contact point (G10 L20, placed on the trigger point the controller reports: on FluidNC the axis itself comes to rest a few hundredths past the trigger, more than the copper is thick, and the app accounts for that) and read back from the controller — the DRO then reads the retract height less that overshoot, with Z0 on the surface. Plate thickness 0 = clip on the copper and the bit as probe; enter the thickness for a touch plate. Settings → Machine holds the feeds, maximum travel and retract.
Tool reference — a fixed conductive block, or a switch-type tool setter, on the machine bed, wired in parallel with the probe input so it can be probed even when the board cannot. Jog the bit a few millimetres above it and Set Reference Here while work Z0 is freshly set on bare copper: the contact and that Z0 are stored together, as a machine setting like backlash. After a bit change — or once the board is solder-masked and the origin can no longer be touched — Probe & Restore Z0 parks at the safe height, probes the spot again and shifts work Z0 by exactly the difference between the two contacts, absorbing the new bit's length; the height map of the loaded side re-anchors at the same time. Mount the spot insulated from the machine frame if your probe circuit grounds through the frame; after setting it, run one Probe & Restore without changing anything — the DRO coming back unchanged is your repeatability check.
Axis calibration (steps/mm)
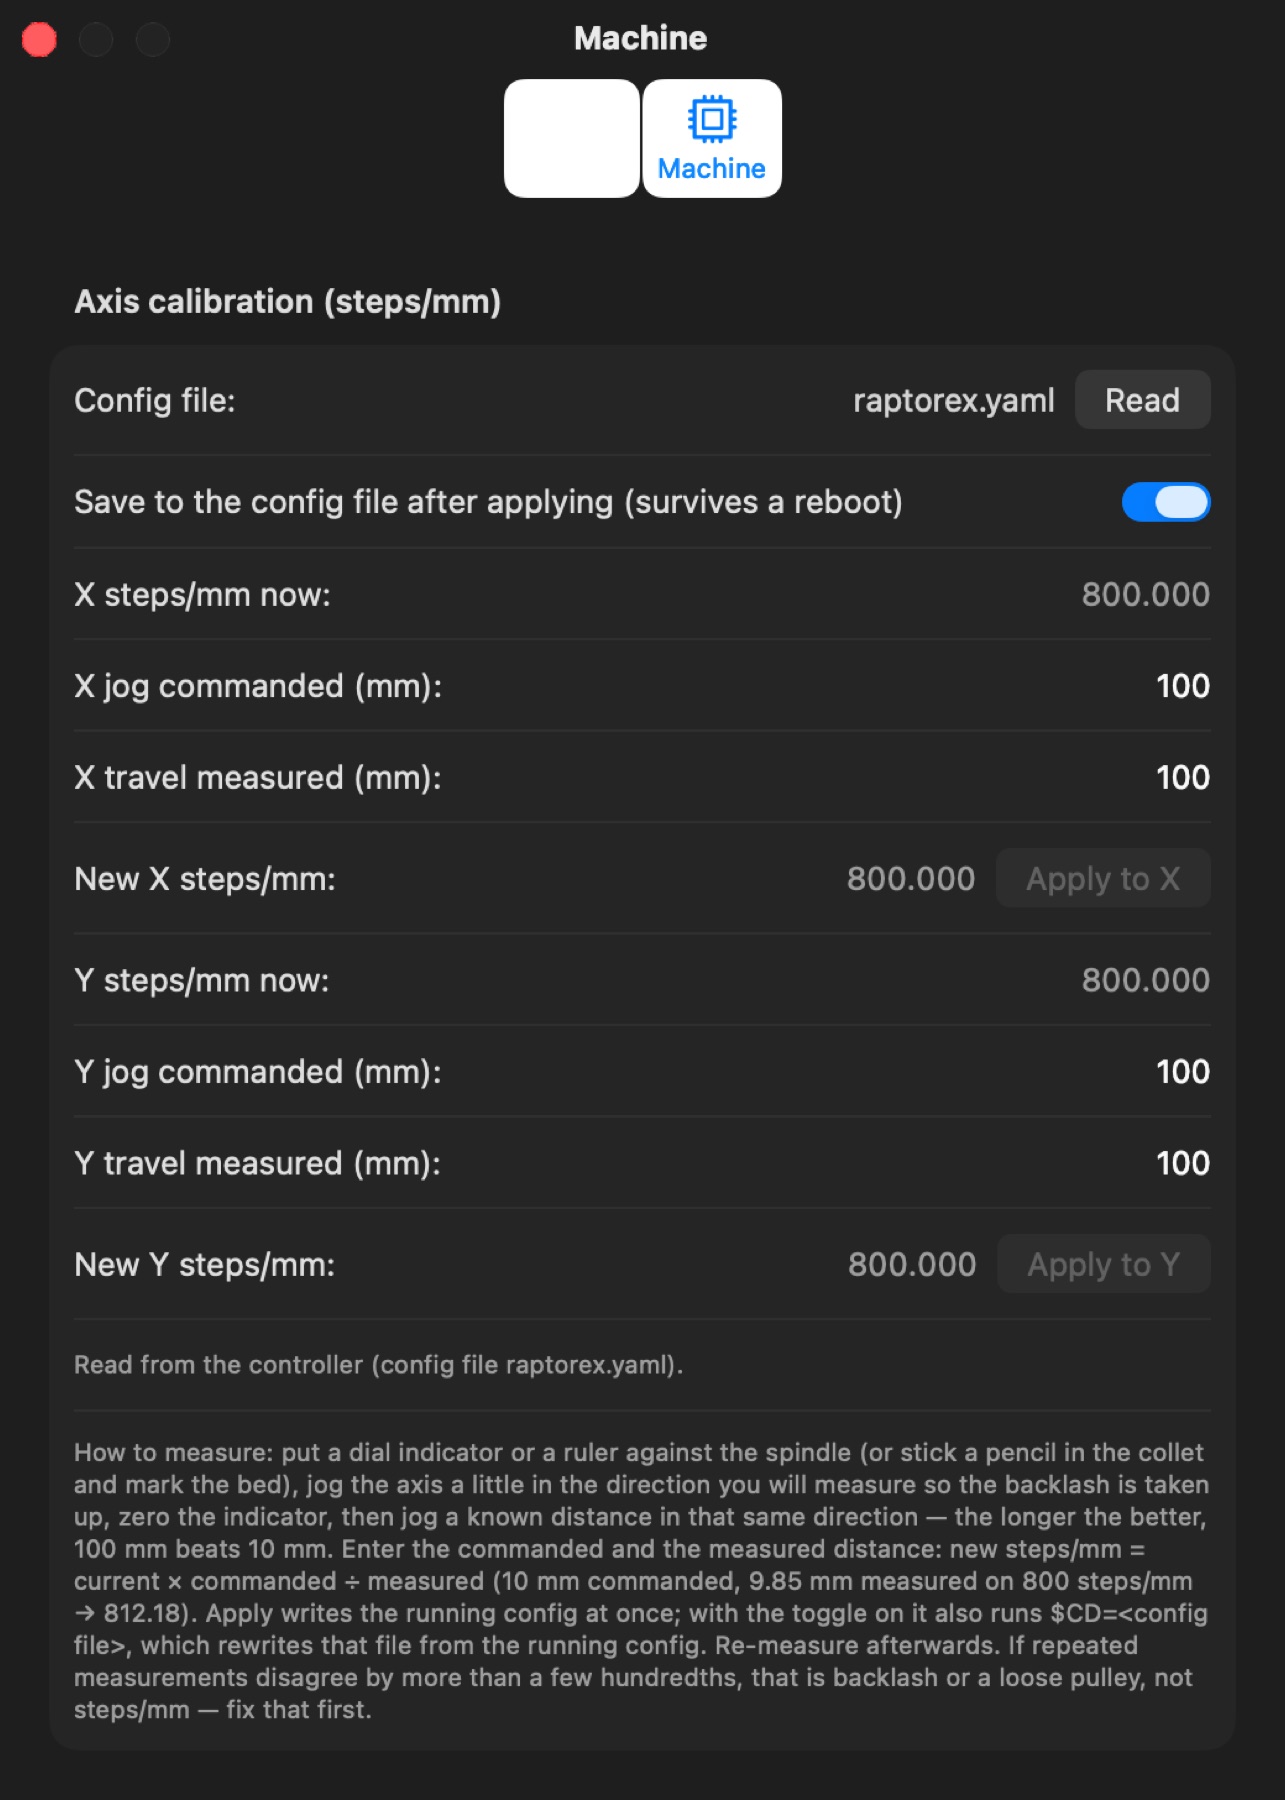
If a 10 mm jog moves the spindle 9.85 mm, the controller's steps/mm is off. Settings → Machine → Axis calibration (FluidNC, while connected) reads axes/x|y/steps_per_mm and the config filename from the controller. Measure with a dial indicator or a ruler: jog a little in the measuring direction first (takes up the backlash), zero the indicator, jog a known distance — the longer the better — and enter commanded and measured; new steps/mm = current × commanded ÷ measured. Apply writes the running config at once ($/axes/x/steps_per_mm=…) and, with the save toggle on, $CD=<config file> rewrites that file (e.g. raptorex.yaml) from the running config so the value survives a reboot. Re-measure afterwards; measurements that disagree by more than a few hundredths point at backlash or a loose pulley, not at steps/mm.
Macros tab
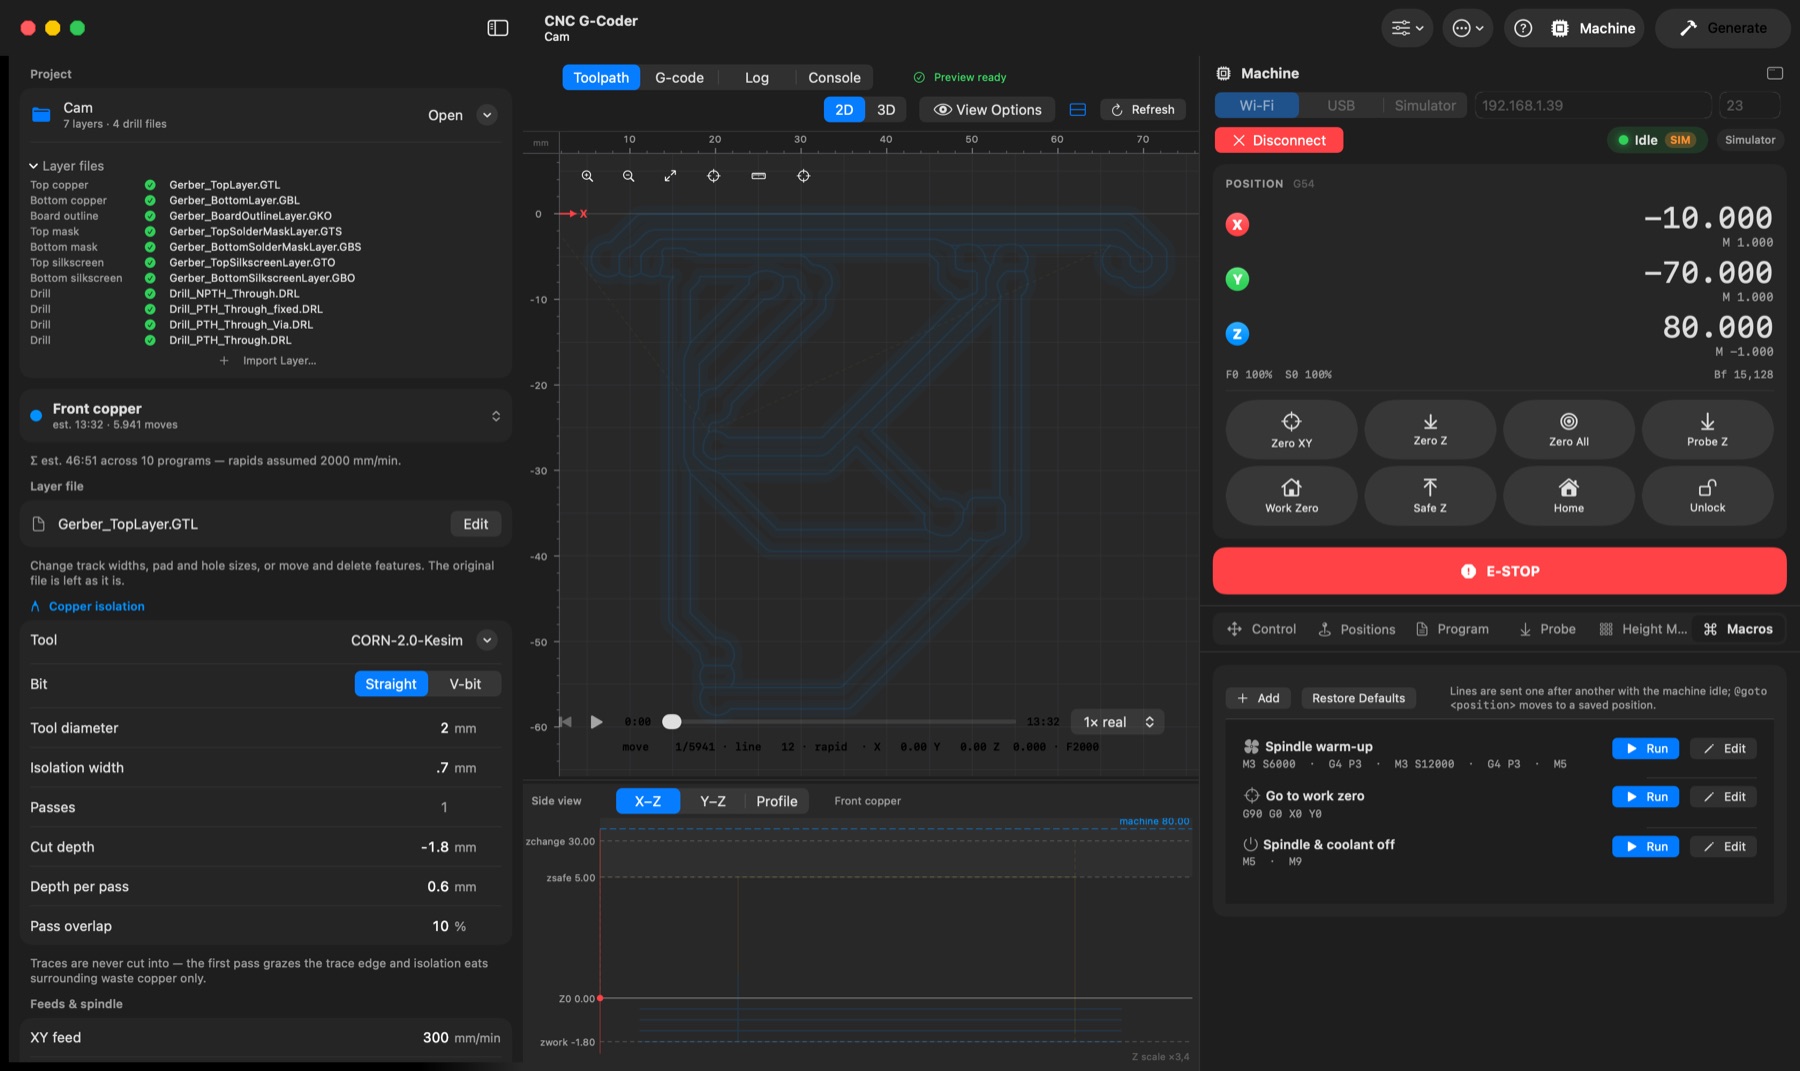
Your own command sequences. Add creates a macro with a name, an optional SF Symbol icon (fan.fill, drop.fill, house…) and the G-code lines it sends; Run sends the lines one after another, waiting for each to be acknowledged (the machine must be connected and idle); Edit, and by right-click Duplicate and Delete; Restore Defaults replaces the list with the built-in examples. Every macro is also a user button on the Control tab; allow while running keeps a button enabled during a job, for short commands such as coolant. @goto <position> in a line moves to a saved position from the Positions tab.
Height Map tab
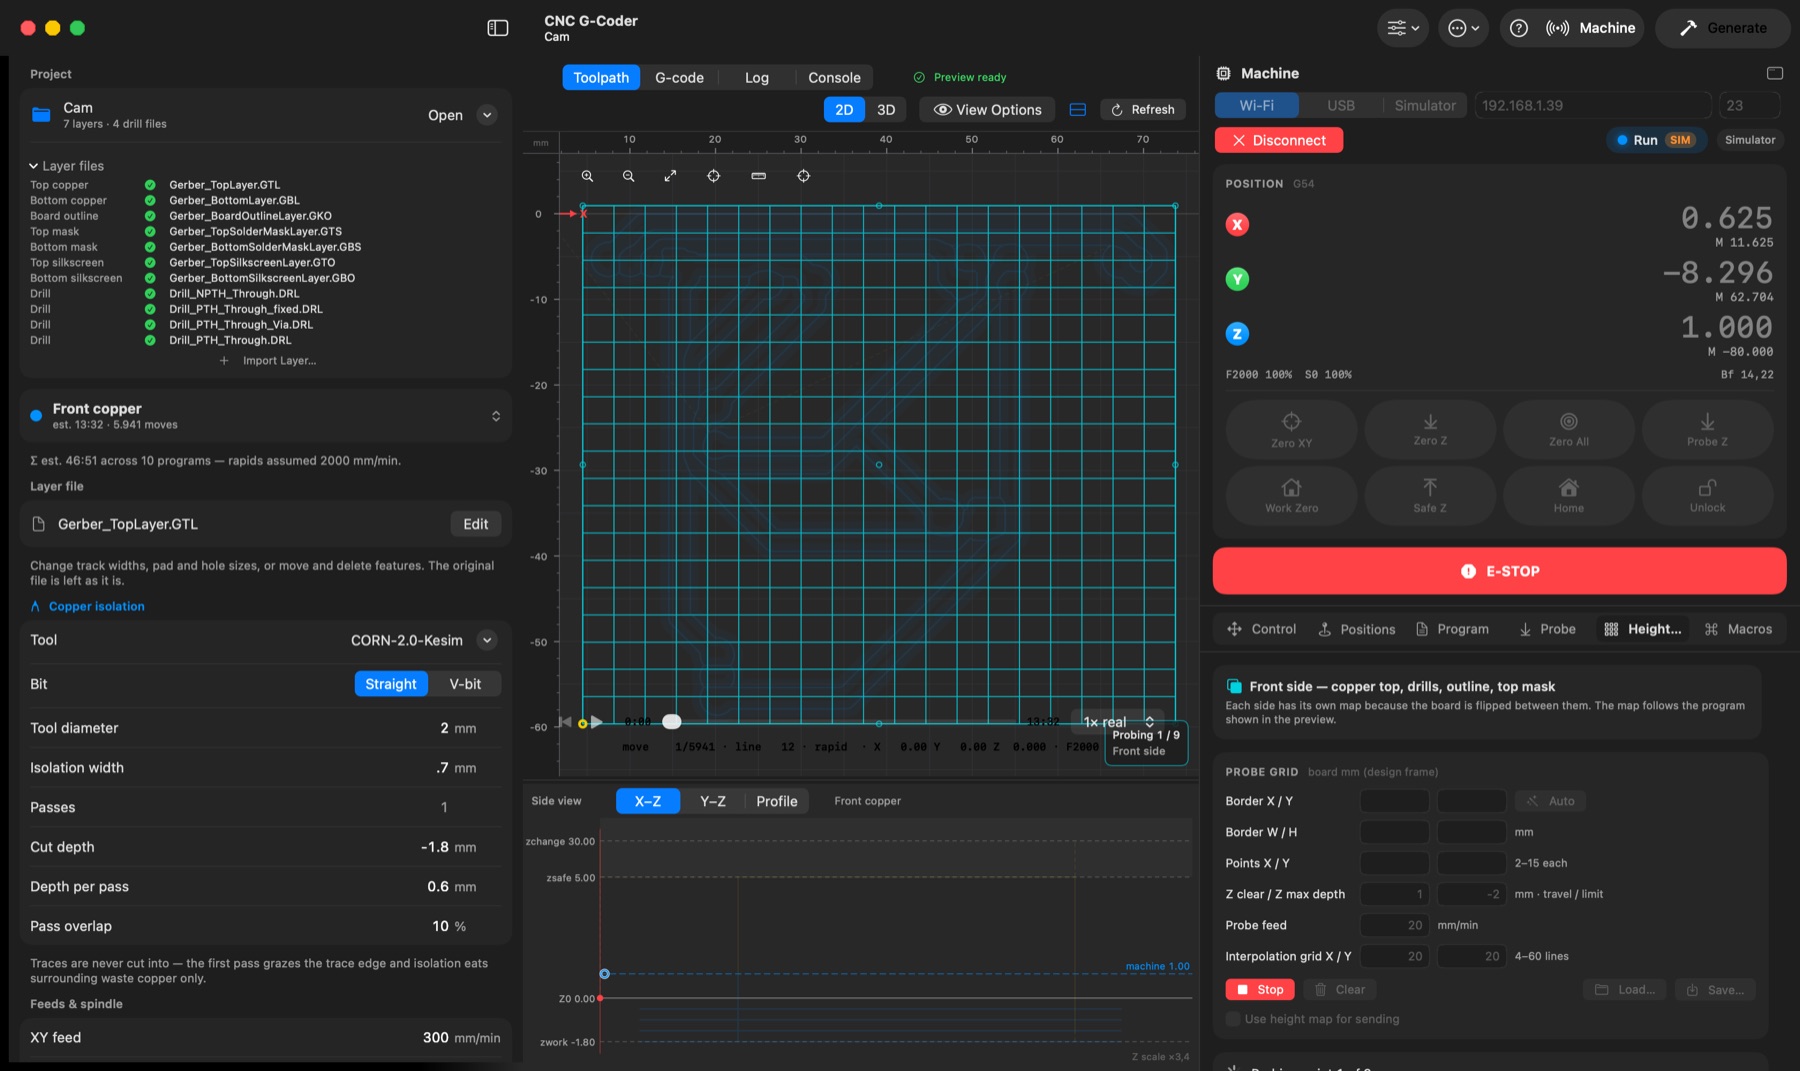
Define a grid over the board (Auto fits the selected program), Probe it and read the deviation. Maps are per side and stored relative to work Z0 as it was when the grid was probed — zero Z on the board first; nothing is probed at X0/Y0, which may lie off the board — so a bit change never costs you the grid: Probe Z at the work origin (or Probe & Restore Z0 from the Probe tab's tool reference) re-anchors the map to the new Z0 automatically and the "Z re-zeroed" warning clears. With Apply height map on, every cut and low plunge of the streamed copy is warped to the measured surface (bilinear interpolation); rapids at safe height are untouched. If the work origin moved since probing, the app warns before applying. Maps are saved inside the project package (HeightMaps/) as soon as a probe completes, and under Application Support; they can also be saved/loaded as JSON by hand; View Options → Height Map shows the points on the toolpath.
Trying it without a machine
Turn on Show the Simulator in the connection picker in Settings → Machine, pick Simulator in the connection bar and press Connect: the app starts a built-in simulator — a FluidNC, or a Carvera when the Controller menu says Makera Carvera (T<n> M6 runs its changer, $J jogs, machine coordinates −travel…0) — (fake-grbl.py, bundled; needs python3 from Xcode's command line tools) on a private port and talks to it like a real controller — real-time motion, alarms, tool-change suspensions, Z probing against a simulated PCB lying on the bed — over the board the probe finds its top (thickness included), next to it the bed, so zeroing, the tool reference and height maps behave like real life; the board's thickness and the work zero's place on the bed are in Settings → Machine, and the board itself lies where the loaded project puts it relative to that zero, with the project's footprint. Its work zero is preset on the board's top corner so the sample programs fit the travel. The state pill carries a SIM tag and the badge reads Simulator; Disconnect or quitting stops it. (Dev: -debugMachineWindow 1 -debugMachineConnect sim.)